As an Amazon Associate, we earn from qualifying purchases.
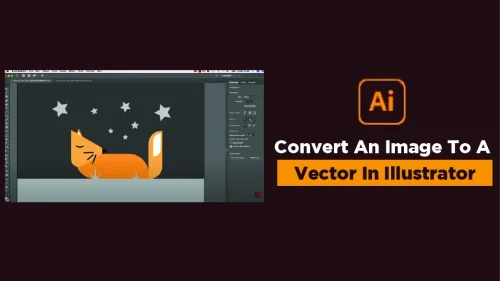
In this step-by-step guide, we’ll walk through how to convert an image to a vector in Illustrator. We will start from a hand-drawn sketch and build up the artwork using basic geometric shapes like rectangles, ellipses, triangles, arcs, and stars.
This project is designed for beginners and intermediate users alike. You don’t need to be a drawing expert to follow along. The goal is to show how Illustrator’s core tools—such as the shape tools, selection tools, and path editing tools—can be combined in a logical, approachable way to produce an attractive vector illustration.
We have also done a post on vectorising images using image trace and pen tool. This process achieves similar results but using a different approach.
This post is made based on a video from one of the best Illustrator courses for beginners, Adobe Illustrator CC Essentials training course by Phil Ebiner and Daniel Walter Scott. When explaining their video, I had some Ai assistance to help explain.
What you will learn
- How to import and lock a hand-drawn sketch as a tracing template
- How to use simple shapes to form complex figures
- How to align, rotate, and adjust shapes using smart guides and direct selection
- How to manage stroke, fill, and layering for clean, finished results
Steps How To Convert an image to a vector in Illustrator
- Step 1: Create a New Document
- Step 2: Import and Lock the Sketch
- Step 3: Enable Smart Guides and Draw the Body
- Step 4: Create the Tail, Head, and Ears
- Step 5: Add Facial Features
- Step 6: Align and Adjust Shapes
- Step 7: Apply Color and Stroke
- Step 8: Merge and Organize
Step 1: Create a new document and import your sketch.

To get started, take a clear photo or scan of your hand-drawn fox sketch or any other sketch.
- Open Adobe Illustrator and create a new document.
- Drag and drop the image onto your artboard or use File > Place to insert it.
- Resize the sketch to fit your canvas.
- Open the Layers panel. Select your sketch layer and double-click it to open the layer options.
- Check “Template” and “Dim Images to 50%”—this makes the layer and the sketch less distracting.
- Name the layer something obvious like “Sketch Template.”
Step 2: Import and Lock the Sketch
Place your hand-drawn sketch (File > Place), reduce opacity, and lock it as a template layer.

Step 3: Enable Smart Guides and Draw the Body
Use the Rounded Rectangle Tool to create the fox’s curled body shape. Turn on Smart Guides (View > Smart Guides) for precise snapping. Start drawing. You can replicate this by combining a rounded rectangle with a well-placed arc or ellipse.

Start with the Rectangle Tool and give it heavily rounded corners using the corner radius handles. Rotate the rectangle slightly to match your sketch. Then, use the Arc Tool to create a tail shape that curls around the body.
Adjust stroke thickness and fill color or gradient so you can differentiate parts easily. Don’t worry about perfection right now—just focus on matching the general silhouette of the fox. Later, you’ll tweak and refine.
Use the Pathfinder Tool to merge overlapping shapes into one smooth body if needed. Creating the head of your stylized fox is where you start to breathe real life into your illustration. This is where those big, pointed ears and cute snouts come into play.
The key is to stick with simple shapes but arrange and adjust them in a way that communicates personality and charm.
Start by drawing a circle or ellipse for the head using the Ellipse Tool (L). Position it above the fox’s body, overlapping slightly. If your sketch has the head tilted or nestled into the tail, rotate the ellipse to match the contour. Use the Direct Selection Tool (A) to subtly reshape the ellipse—maybe pull down the top a bit to give the illusion of the fox resting peacefully.
Now, for the ears. Use the Polygon Tool, click anywhere on the canvas, and set the number of sides to 3 to create a triangle. Resize and rotate it to position it correctly above the head. Duplicate it for the second ear, flip it horizontally, and adjust the angle slightly so they’re not perfectly symmetrical—this creates a more natural, sleepy look.

Once your ears are in place, select both and Send to Back (Right-click > Arrange > Send to Back) so they appear behind the head shape. This creates a realistic overlap and layering that mimics depth without complicated shading.
Optional but recommended: Add small inner ears by duplicating the triangles, scaling them down, and changing the fill color to a lighter shade. This adds polish and contrast.
Step 4: Create the Tail with Pathfinder
Use the Arc Tool or Ellipse Tool (L) to draw a curved tail wrapping around the body. Adjust curves with the Direct Selection Tool (A) for a fluffy, natural look. Add a white tip by layering a small shape filled with white.
Select both the shapes. Go to Window>Pathfinder. Choose the second option, Minus Front.

Step 5: Add Facial Features
Use the Ellipse and Line tools to draw eyes, a nose, and whiskers. Now that the basic shapes are in place, it’s time to give them that professional polish. The difference between a rough draft and a clean illustration often lies in how smooth the curves are. Illustrator’s Direct Selection Tool (A) allows you to tweak individual anchor points and their handles.
Step 6: Align and Adjust Shapes
Use the Selection Tool to move and rotate; use the Direct Selection Tool to tweak anchor points. Click on any shape, and then click on a specific anchor point.
Small direction handles will appear—drag them outward or inward to round out sharp corners or adjust angles. This is especially useful for the tail and ears, which should feel soft and flowing rather than stiff.
Use the Convert Anchor Point Tool (Shift + C) if you need to change a straight corner to a smooth curve or vice versa. This flexibility helps you fine-tune the shapes without redrawing them entirely.
Refining anchor points is where your fox illustration begins to gain personality. Maybe you want a more droopy eye, a rounder snout, or a curlier tail—this is where those tweaks happen.
Step 7: Apply Color and Stroke
Use a limited palette of warm, earthy tones like oranges, creams, and browns for a cozy, natural look. Fill the body with medium to deep orange and add lighter cream accents to areas like the inner ears and the tail tip for depth. To fill shapes, select them and press Shift + X to toggle fill and stroke, or use the Fill and Stroke boxes in the toolbar.
Set stroke weight to 2 pt using the Stroke panel (Window > Stroke). Choose rounded caps and corners for softer lines. To control stroke scaling when resizing, go to Illustrator > Preferences > General (Mac) or Edit > Preferences > General (Windows), then check or uncheck Scale Strokes & Effects depending on whether you want strokes to resize with your artwork.
Add depth by layering fills and strokes. For shading, duplicate shapes (Ctrl/Cmd + C, then Ctrl/Cmd + F to paste in front), darken fills slightly, and offset by a few pixels. Adjust opacity in the Transparency panel (Window > Transparency).
For subtle blur effects, select the shape and go to Effect > Blur > Gaussian Blur, then adjust the radius—but use this sparingly to keep the design clean.

Step 8: Merge and Organize Your Illustration
To combine shapes, use the Pathfinder panel (Window > Pathfinder) or the Shape Builder tool (Shift + M). These tools let you unite, subtract, or intersect shapes to create clean, unified forms.
As your illustration grows detailed, managing layering and arrangement is key. Use the Layers panel (F7) to organize parts like the head, body, tail, and details on separate layers. Lock layers you’re not working on with Ctrl + 2 to avoid accidental edits, and unlock all with Ctrl + Alt + 2.

Control stacking order with these shortcuts:
- Bring to Front: Ctrl + Shift + ]
- Send to Back: Ctrl + Shift + [
- Bring Forward (one step): Ctrl + ]
- Send Backward (one step): Ctrl + [
These help you place elements correctly, like putting ears behind the head or a tail in front. Group related objects using Ctrl + G for easier management. Name your layers clearly (e.g., “Tail,” “Head”) to find them quickly later.
To temporarily hide objects cluttering your workspace, use Ctrl + 3 to hide and Ctrl + Alt + 3 to show all hidden objects. By merging shapes carefully and organizing layers, locking and hiding elements as needed, you keep your workflow smooth and your artwork clean.
Frequently Asked Questions
What are the main shape tools in Adobe Illustrator, and how can they be used?
A: The main shape tools in Illustrator include the Rectangle Tool (M), Ellipse Tool (L), Polygon Tool, and Star Tool. They are used to create basic geometric shapes that can be reshaped, rotated, and scaled to form complex illustrations. For example, the Rectangle Tool can create bodies and legs, the Ellipse Tool is perfect for heads and tails, the Polygon Tool makes triangles for ears, and the Star Tool adds decorative details like whiskers.
What the difference between Selection Tool and Direct Selection Tool,?
The Selection Tool (black arrow, shortcut V) moves, rotates, and resizes entire shapes—use it for adjusting whole objects like moving the fox’s tail. The Direct Selection Tool (white arrow, shortcut A) lets you select and move individual anchor points or segments to reshape parts, such as rounding an ear tip or adjusting a tail curve. Together, they give you precise control without redrawing.
How can I work accurately on small details and keep shapes aligned?
Use Zoom (Z) to closely inspect and adjust fine details like eyes or fur edges. Turn on Smart Guides (Ctrl/Cmd + U) and Snap to Point to help objects snap into perfect alignment, preventing awkward gaps and ensuring symmetrical parts like eyes and paws line up cleanly.
When should I enable these tools and features?
Activate Zoom, Smart Guides, and Snap to Point early in your workflow. Doing so saves time, reduces frustration, and helps your illustration look polished and professional.