As an Amazon Associate, we earn from qualifying purchases.
Before I knew how to make a pattern in Illustrator, I used a copy and duplicate method that was both slow and complicated. This post saves you this headache and shows you the method professionals use.
What You Will Learn
- How to create a new artboard and set up your workspace
- How to design shapes or objects to turn into a pattern
- How to use Object > Pattern > Make to generate a seamless pattern
- How to adjust tile type, spacing, and copies in the Pattern Options panel
- How to save your pattern as a swatch for future use
- How to apply and edit your saved pattern on the artboard
How you can Make a Pattern in Illustrator
This was, however, slow and inconsistent. Here is how to do it the right way.
Step 1: Create a new page. Go to File>New and set the artboard sizes and specs.
Step 2: Make a shape you want to create a pattern from. You can use one object or a number of different objects.
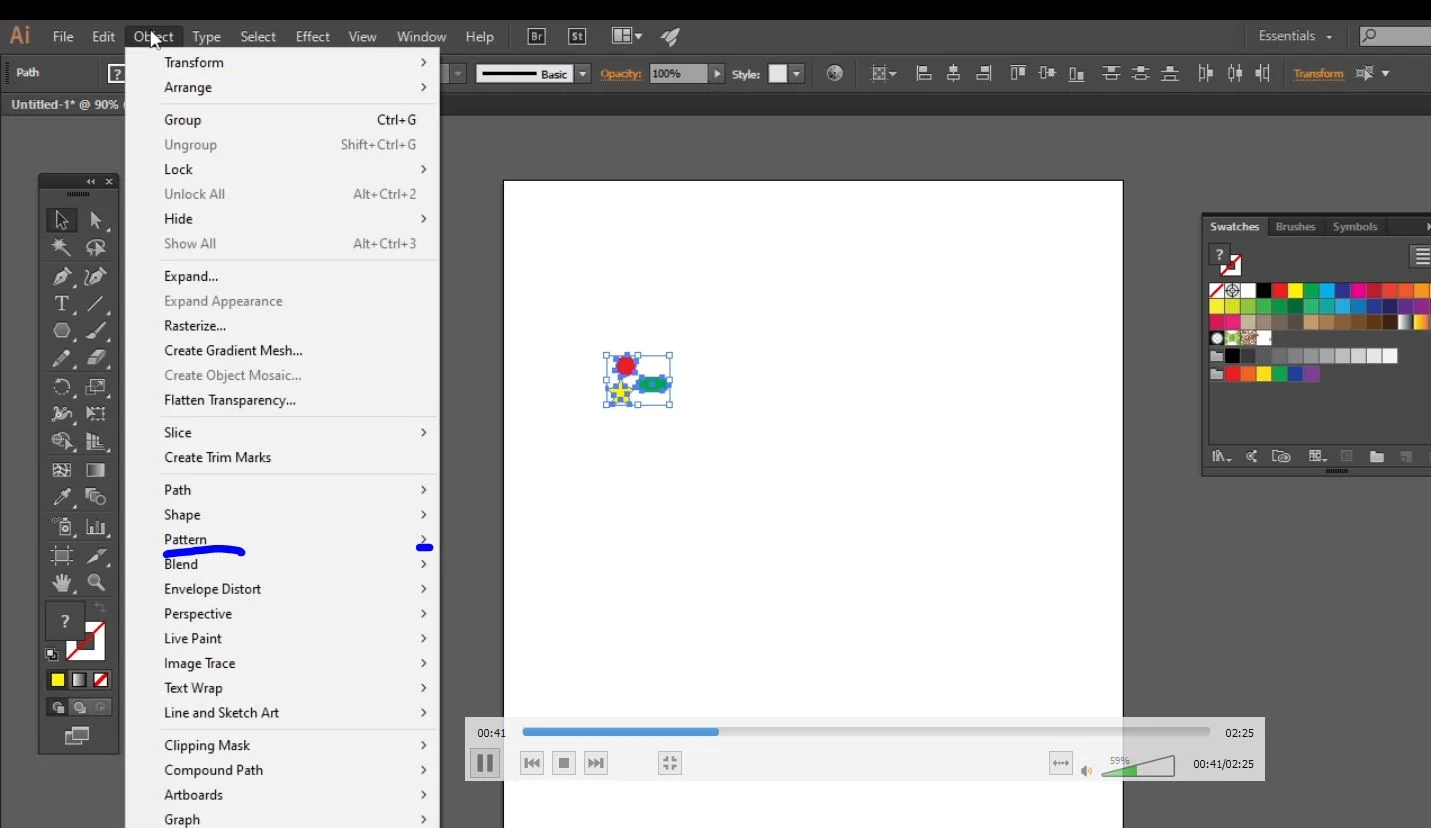
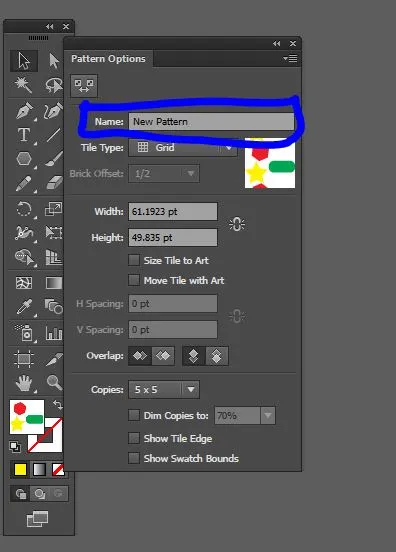
Step 3: Select the shape, then go to Object>Make>Pattern. You will notice this pattern panel coming up. By changing the tile type, you can set how you want your pattern to be aligned. Choose the best one that works for you. If you want, you can label your pattern template on the same panel.
Check the Size Tile to Art. This keeps the spacing clean and accurate. It makes the pattern tile fit perfectly around your shapes.
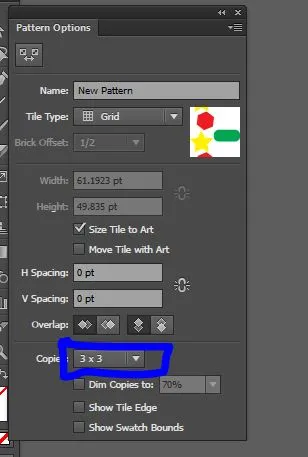
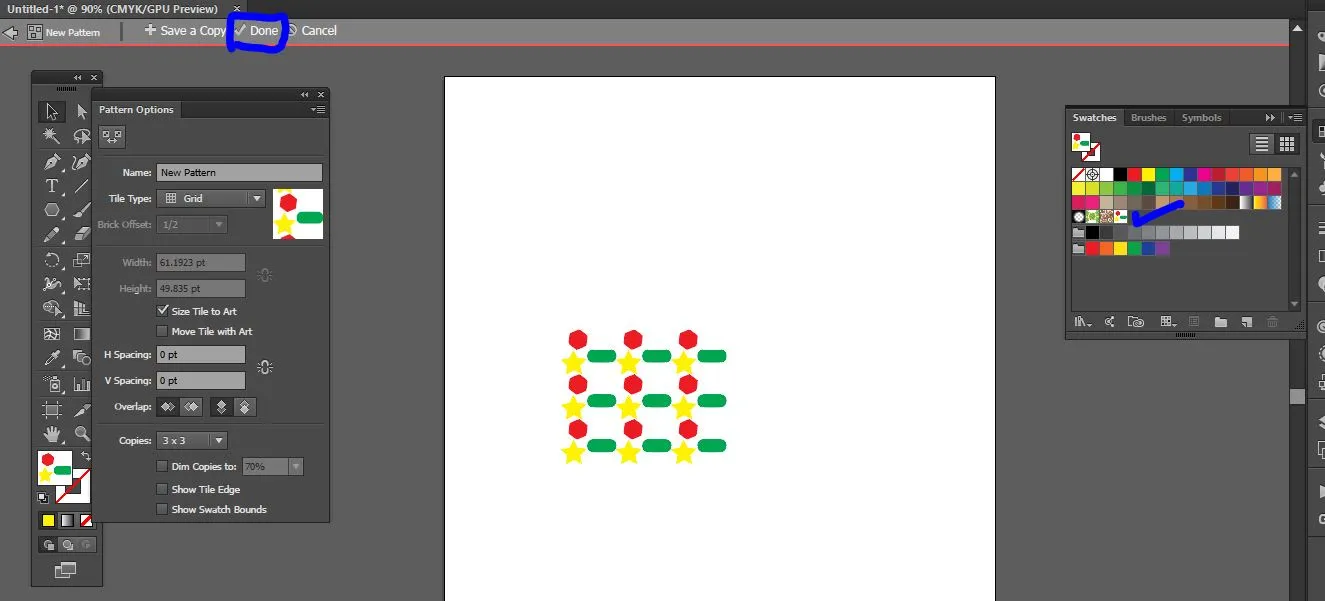
Step 4: You can also manipulate the size and spacing between the shapes or objects you use to make a pattern. Finally, you can also set how many copies you want, the default being 3×3. Click done if you are happy with it. If you want the objects in your pattern to overlap, try using negative spacing values in the Pattern Options panel. This allows parts of your design to blend or connect seamlessly.
H and V spacing indicate the space between vertical and horizontal patterns in your design. It is measured in Points by default.
Step 5: You will get a notification that your swatch has been added to swatches. Click OK. If you cannot see the swatches, go to Window>Swatches. The pattern disappears from your window but appears on the swatches panel. If you cannot see it, go to Window>Swatches.
You can also create a pattern swatch by simply dragging your artwork directly into the Swatches panel instead of using the Pattern Maker tool.
Step 6: To create the pattern, drag and drop the pattern from the Swatches Panel on the artboard and use the direct selection tool to edit it.
Step 7: To edit a pattern you’ve already made, double-click the pattern in the Swatches panel. This reopens the Pattern Options window, where you can adjust tile type, spacing, or even modify the original shapes.
You can either use vector shapes or raster images to create patterns. The steps followed are the same.
Quick Summary
Creating a pattern in Adobe Illustrator is simple once you know the right method. Start by setting up a new artboard and designing the shape or objects you want to repeat.
Go to Object > Pattern > Make to open the Pattern Options panel, where you can adjust the tile type, spacing, and copies to create a seamless design.
You can fine-tune your layout using options like Size Tile to Art or even use negative spacing for overlapping effects. Once finished, your pattern is automatically saved in the Swatches panel for future use.
You can apply it to any object or edit it later by double-clicking the swatch. Vector shapes are ideal since they remain fully editable, unlike raster images.