As an Amazon Associate, we earn from qualifying purchases.
Adobe’s Live Paint Bucket Tool comes in handy if you want to quickly color complicated illustrations or overlapping shapes without the need to enclose paths.
It auto-detects enclosed sections on your illustration and assumes them to be independent sections. It is then able to easily assign a color of your choice to those particular sections. The older fill tool could not do this.
Unlike other fill tools that only fill shapes, the Live Paint Bucket can also apply colors to stroke paths. Once you choose a color, you move from one swatch to another using keyboard arrow keys.
What You Will Learn
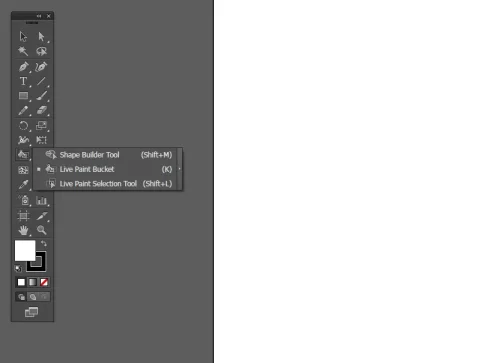
- Where is the Live Paint Bucket Tool?
- Convert objects to a Live Paint Group before coloring.
- Applying and switching colors using swatches, gradients, and arrow keys.
- Using Gap options to fix open paths and gaps
- Expanding objects for further edits
The Live Paint Bucket Tool can be found on the toolbar under the Shape Builder Tool. Click and hold the Shape Builder tool to bring it up, or use the shortcut k.
Once you pick the tool, the cursor changes to a small paint bucket icon, showing you where you can apply color.
When you move the cursor around an enclosed shape or area that can be filled with color, you will notice three small color swatches above the bucket.
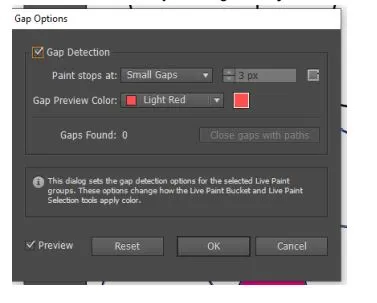
If the shape path is not fully enclosed, the cursor shows a prohibition symbol. This means you cannot fill with color unless you check the path and ensure it is enclosed. You can do this manually or use the Gap Options feature for a quick fix.
To do this, go to Object > Live Paint > Gap Options. If the gaps are too small, you can opt to ignore them or highlight them to know where they are.
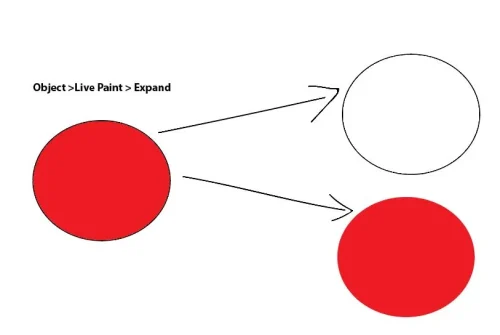
After applying colors, you can leave your object as is. Alternatively, if you need to edit further or add more effects, select it, then go to Object > Live Paint > Expand.
Live Paint Bucket Tool in Illustrator
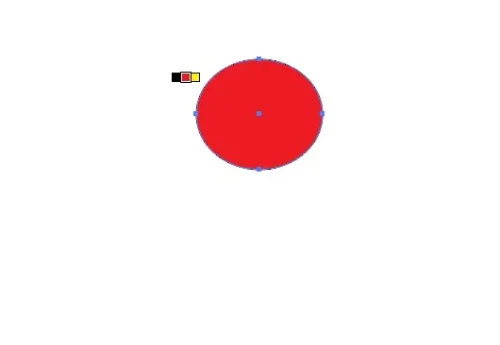
Step 1: Choose the selection tool shortcut V and select the objects.
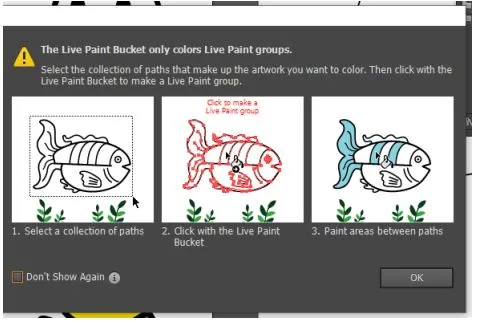
Step 2: Go to Object > Live Paint > Make. This will convert your objects into a live paint group. Alternatively, you can click Control+G to group the objects.

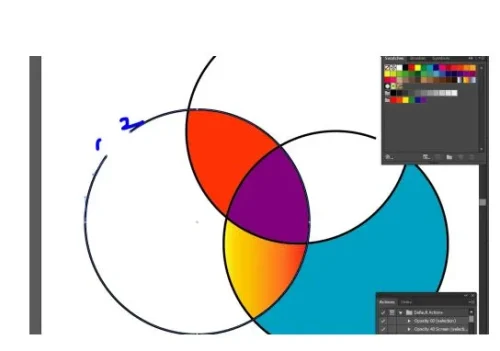
The Live Paint Bucket tool will view grouped objects as one single object with different segments. This allows you to fill overlapping and enclosed areas as separate entities.
If you do not group or convert to a Live Paint Group, the Paint Bucket tool will not detect the spaces as one object with enclosed spaces but as different objects. It will not work.
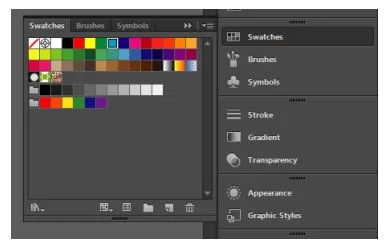
Step 3: Go to Window>Swatches to bring up the Swatches Panel.
Step 4: Click K to pick the Live Paint tool and choose the swatch from the swatch panel. Click on the image to add the color picked.
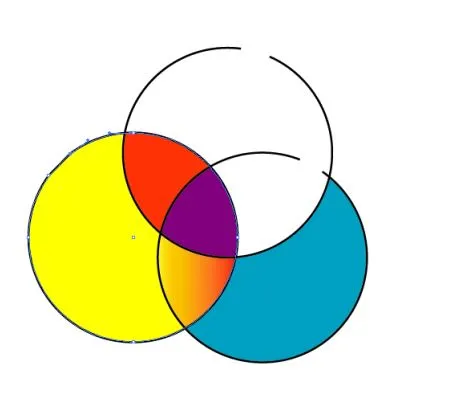
Step 5: Click on another swatch to pick it. Click on another section to add the new swatch color. I will make it yellow and green.
Step 6: If you have not created swatches, you can double-click on the fill area to set a color. If you notice a prohibition symbol on the bucket, it is because the points on your shape are probably not enclosed.
Designing with the Live Paint Bucket tool
When you click the right and left arrow keys after choosing the tool, the next color is selected. You can either choose a solid color or gradient.
To speed up your workflow, you can use the left and right arrow keys on your keyboard to navigate between the selected colors.
In the below design, I have added swatches and then removed outlines to create the design.

If the points are not joined to close the shape, the tool does not work. Below is an example. To solve this issue, you can either join the disconnected points.
Normally you would select the 2 points and click Control+J to join. However, this will not work because you have already converted the object to a live paint group and are on different paths. Choose the pen tool (shortcut P) and click on one point, then the next to close the shape. You can now fill it with color.
When you now use the Live Paint tool, it works. To know how many gaps there are, select the object and go to Object>Live Paint>Gap Options. You can now add a swatch, like in the other sections.
To modify the colors or just remove the stroke, click on the None (/) in the Swatches Panel with the Live Paint tool selected. If you want to edit a swatch, just choose the selection tool, V, and then double-click on the section. The swatch is isolated, allowing you to edit it alone.
Conclusion
The Live Paint Bucket tool can also be used to create pixel art in Illustrator! If you set up a grid (View > Show Grid) and use Snap to Grid, you can quickly fill individual squares with colors, mimicking a pixelated effect.
It is a powerful coloring tool, although it is limited when working with objects with too many open paths. You must also know how it works to use it effectively. For example, failure to group can result in errors that can challenge beginners.
Frequently Asked Questions
Where is the Live Paint Bucket Tool in Illustrator?
The live paint tool is found under the Shape builder tool on the side. You can either click and hold on it to open the live paint tool or use short cut K in illustrator CC.